
Hi Crafty friends,
Today, I’m up on the Pretty Pink Posh Blog with my fun Construction Additions card. Last year Pretty Pink Posh released some super fun Construction products, so here are some great additions to the set!
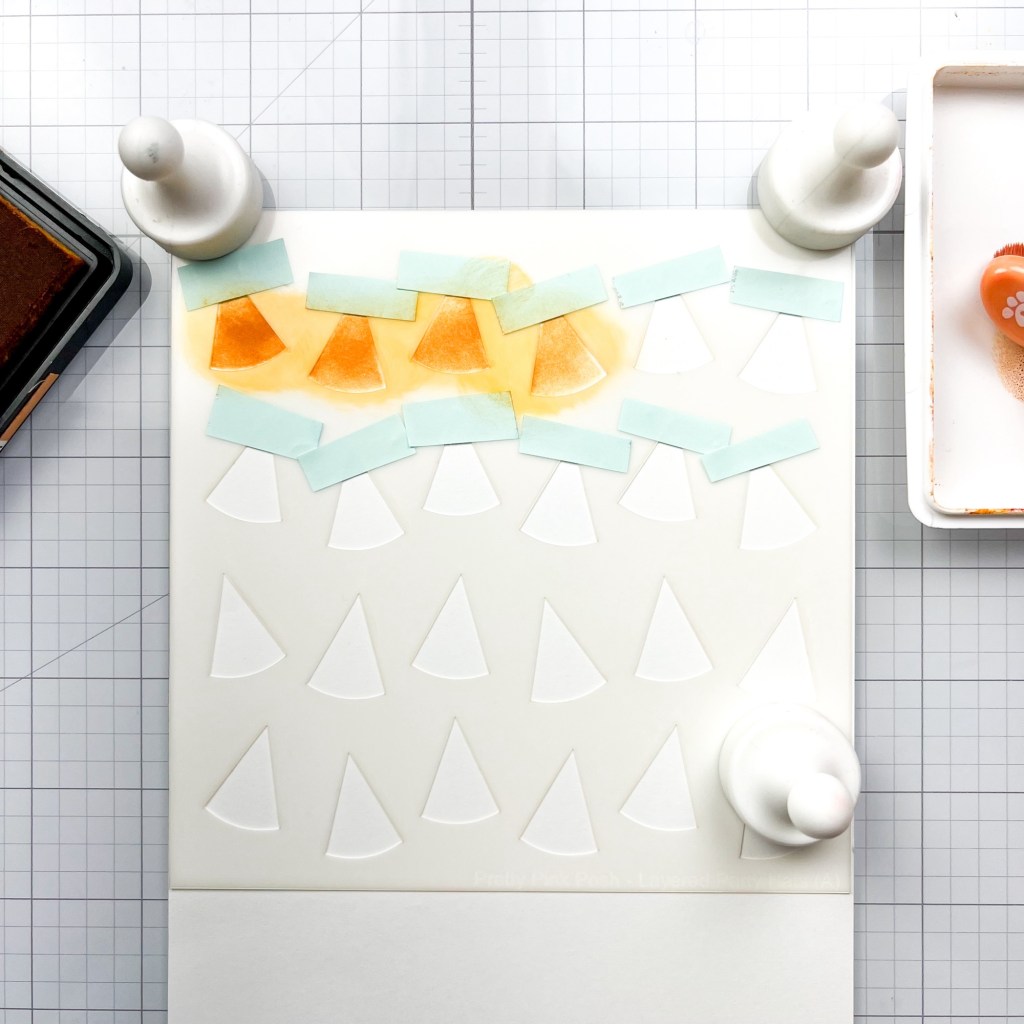
Starting off to make a background, at the time I didn’t have the Layered Roads. So with that I created some Safety cones, with some masking of the Layered Party Hats Stencil .
1. Masking of the top of the Layer Party Hats Layer A. Ink blending on Lawn Fawn Fake Tan and Pumpking Spice ink.
2. Created the base by taking the die from Spring Mug Additions, it looks like the top layer for the honey dipper. Using the die to cut into acetate, with partial die cutting. The opening is only 13/16 of an inch. Placing it at the bottom and mask if need, ink blend on black ink.
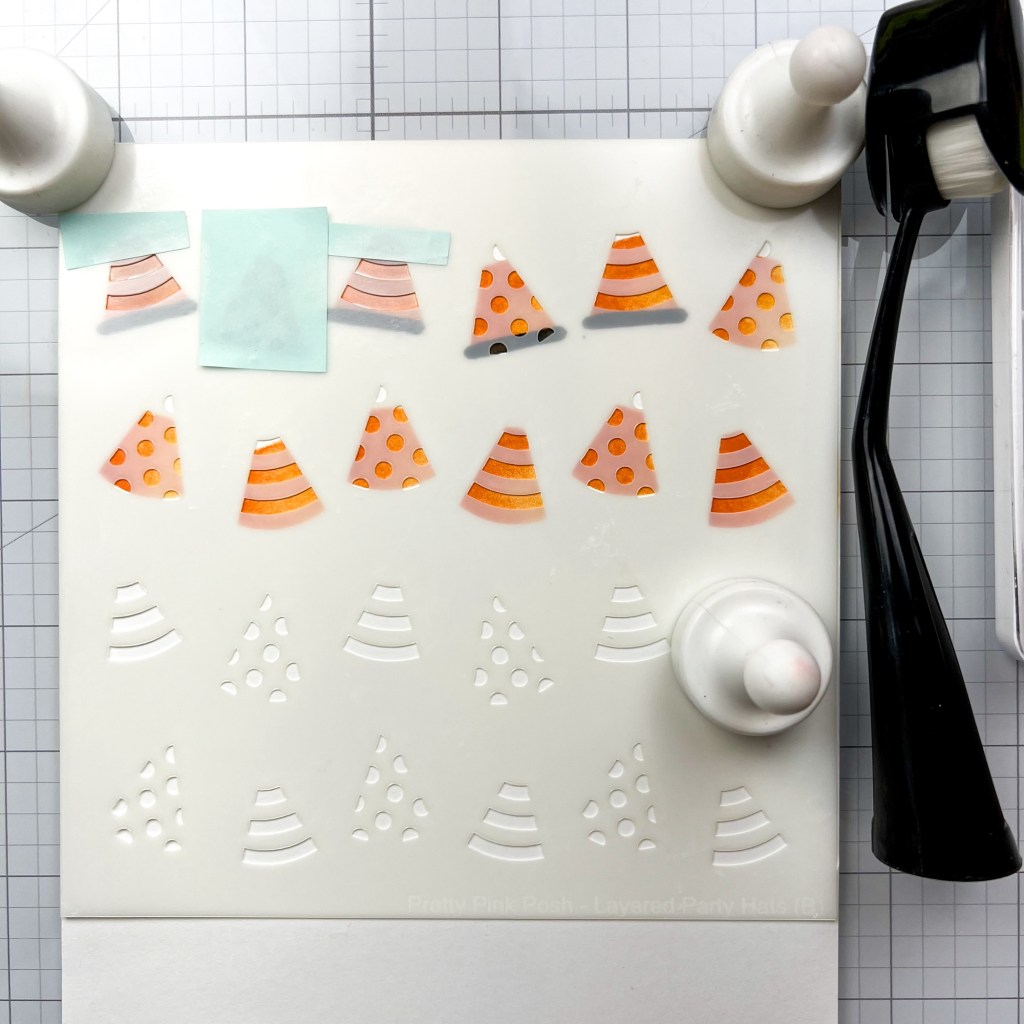
3. Take Layered Party Hats Stencil – layer B place over, you will have to slide around to positions over the ones that have the Dots. Mask off the top and sides. Blend on a white Pigment Ink for the stripes on the Safety cones.

4. Stamp out in your Misti, the Cement Truck and Concrete Roller onto X-Press It smooth white cardstock with Memento Tuxedo Black ink.
COPIC Colors used:
Safety signs: YR 09, YR07, YR04
Pile of Rocks: W3, W1, W0
Concrete Roller: Y18, Y15, !13,
Cement Truck: B26, B24, B23, B21
Tires: C7, C5, C3
Wheels: C3, C1, C0
Windows: BG000
Shovel Handle: E44, E42, Blade: C3, C1, C0
5. Die Cut out with Construction Additions Coordinating Dies.
6. Trim a piece of Concord and 9th Dove, measuring 1 1/2 X 6 inches long.
7. Die cut out with the thinnest die Simple Stripes Dies, one from MFT- Lemon Drop and two white stripes.
8. Attach the white stripes on the edges of the gray strip, yellow in the center using liquid glue.
9. Adhere the road that you have made on to the Safety Cone panel at slight angle with glue. Trim off the edges that hang over the panel.
10. Cut the panel down to 4 1/8 X 5 3/8 Horizontal. With liquid glue adhere to a black panel measuring 4.25 X 5.5 inches.
11. Place panel in the Misti with the image in the general areas so you can stamp out your sentiment for the Construction Additions Stamp with Black ink for a perfect placement.
12. Add 3D foam squares to the back of the colored images and attach to the panel. Attach to a Standard A2 card base.
13. Add highlights with a Gelly Roll white #08 pen.


Leave a comment