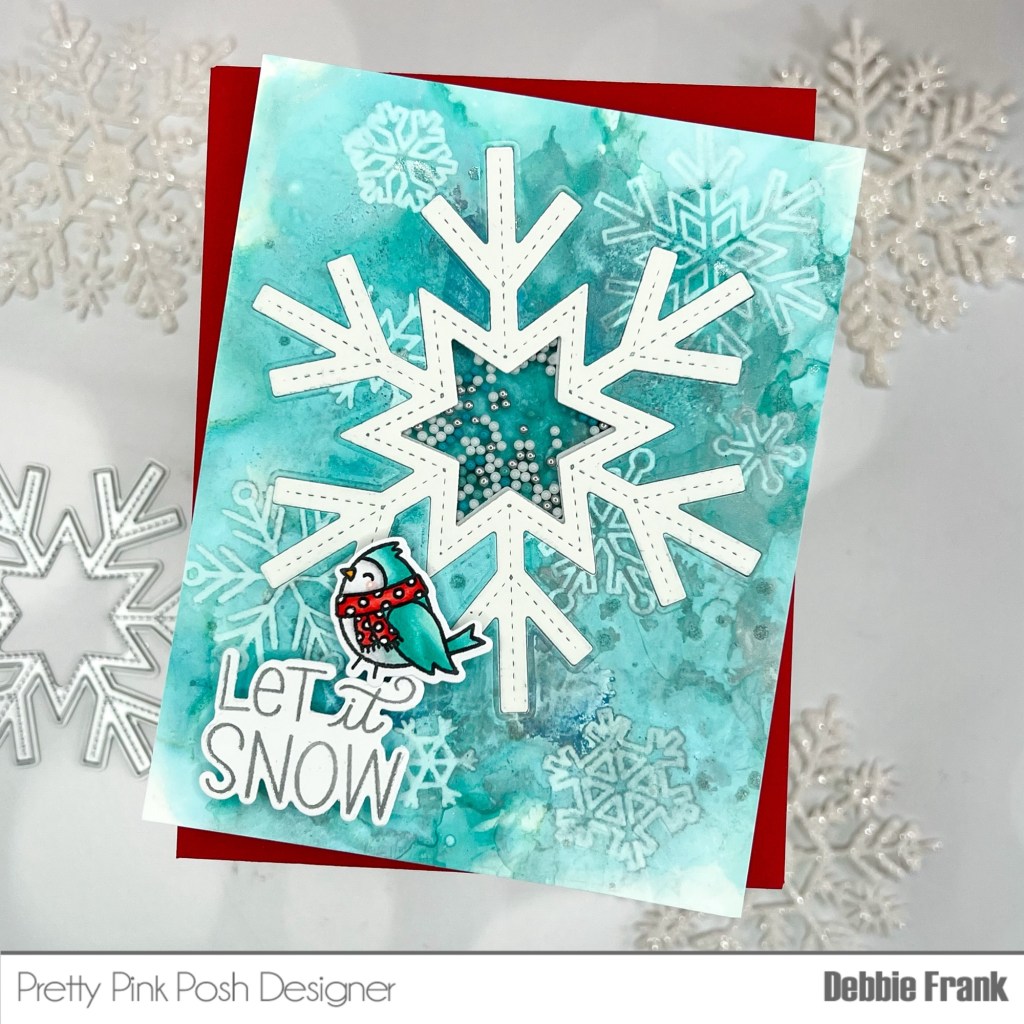
Hi friend, it’s been a while since I’ve played with my Alcohol Inks. Decided to do an Ink Lift, it hasn’t worked well in the past but I think I figured it out this time!
Using a Yupo panel a little larger then a standard A2 to cut the best part of it. Using Laguna, Pearl Tranquil and Silver with 91% alcohol and an Air puffer.
Then in place the panel in your Misti, lay down the Snowflake stamps that you want. Using the Alcohol Ink Lift by Ranger. Clean off the stamp in between and stamp again. I did it like 3-4 times cleaning in between every time. Some clean or buff off I didn’t do that. I felt like it smeared the color off where I didn’t want it to.
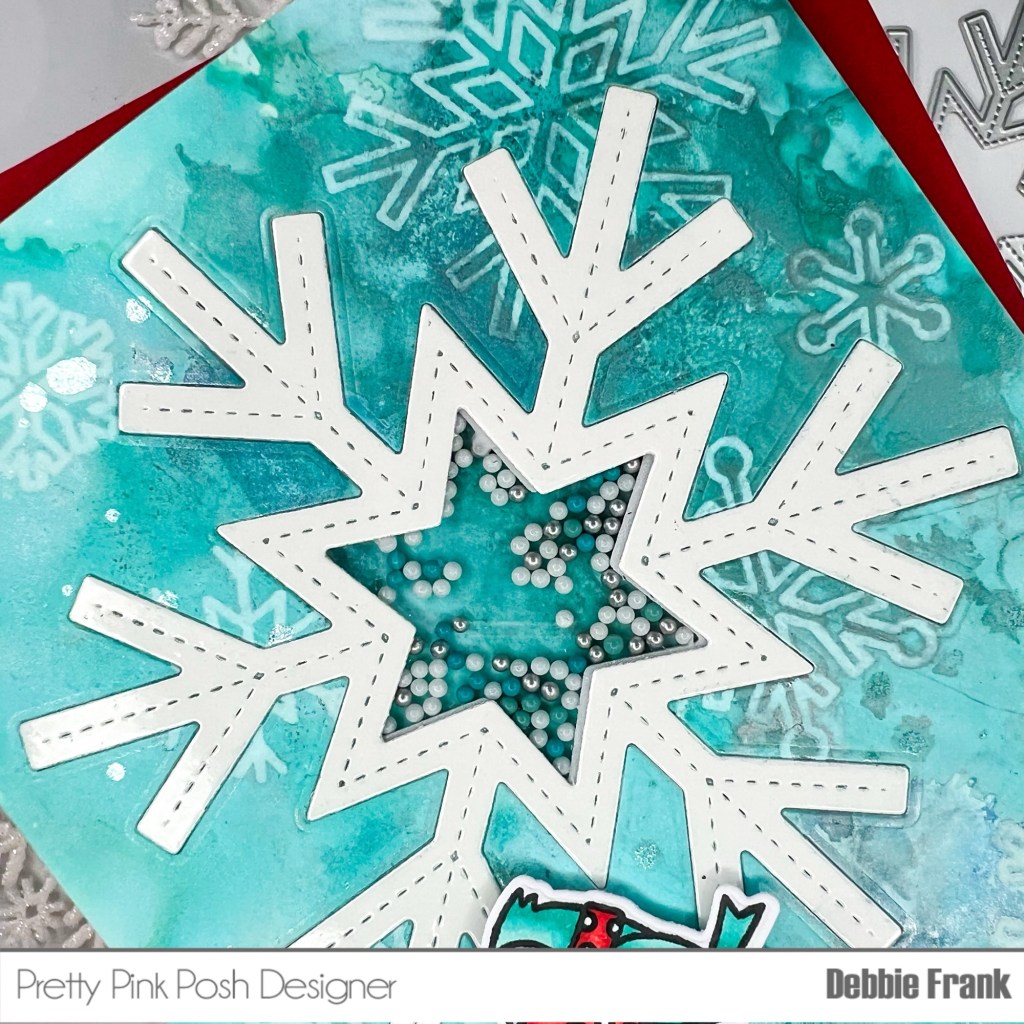
Next was to place and cut out the large Snowflake Shaker Die in the middle of the panel. Save the cut out to glue on to the card base.
From White glossy paper die cut out the Snowflake and with the center cut out as well.
On the back of the panel adhere acetate with double side adhesive tape covering the opening window.
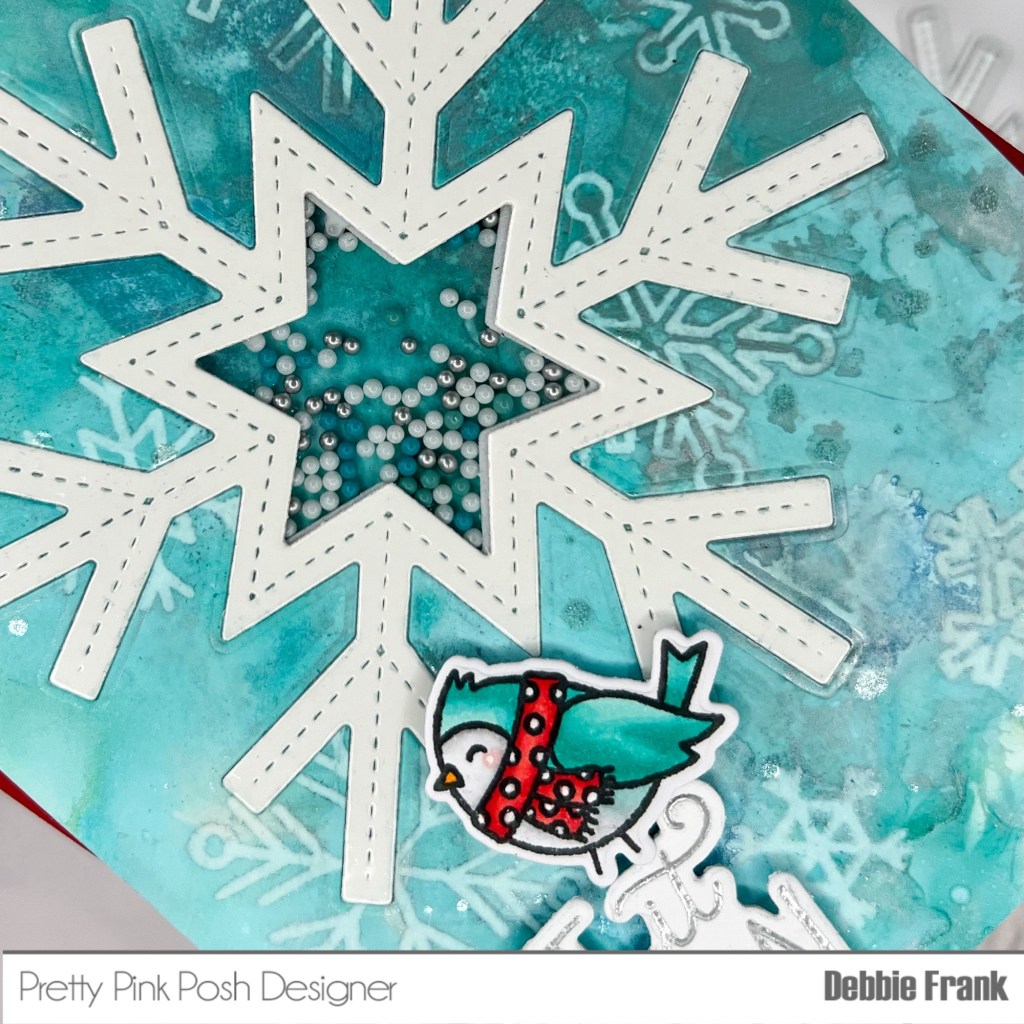
Add thick foam tape around the window to make a well for the Snow Days Shaker Beads. Attach the Snow flake frame to the front of the panel. Add the beads in the well and then carefully attach the base.
Stamp out the cute bird with the scarf from the Winter Birds Stamp.
COPIC coloring guide:
BG15, BG13, BG11
R11
YR04
R22, R24, R27
N2, N0
Then with the Coordinating Dies cut out the images, add foam squares to the back.
Lastly I stamp and heat embossed with Silver powder the Let It Snow from the Winter Greeting Stamp set and cut out with the Coordinating Dies. Add foam squares to the back and adhere it all together


Leave a comment