
Hi friends, here today with the adorable Mitten Shaker die. Can you believe this is the first time using it?!
So I started off with the Layering Winter Hats Stencil with a standard panel and Layer A on a grip mat. With SSS Pawsitively Ink, ink blended on Bubblegum. Then with Layer B I used SSS Pawsitively Cherry Ink.
Trim it down to 5.25 X 4 inches, so that it could later be matted with a matching red cardstock. Before it was attached I ran it through my Platinum 6 machine with the Pierced Snowflakes Plate.
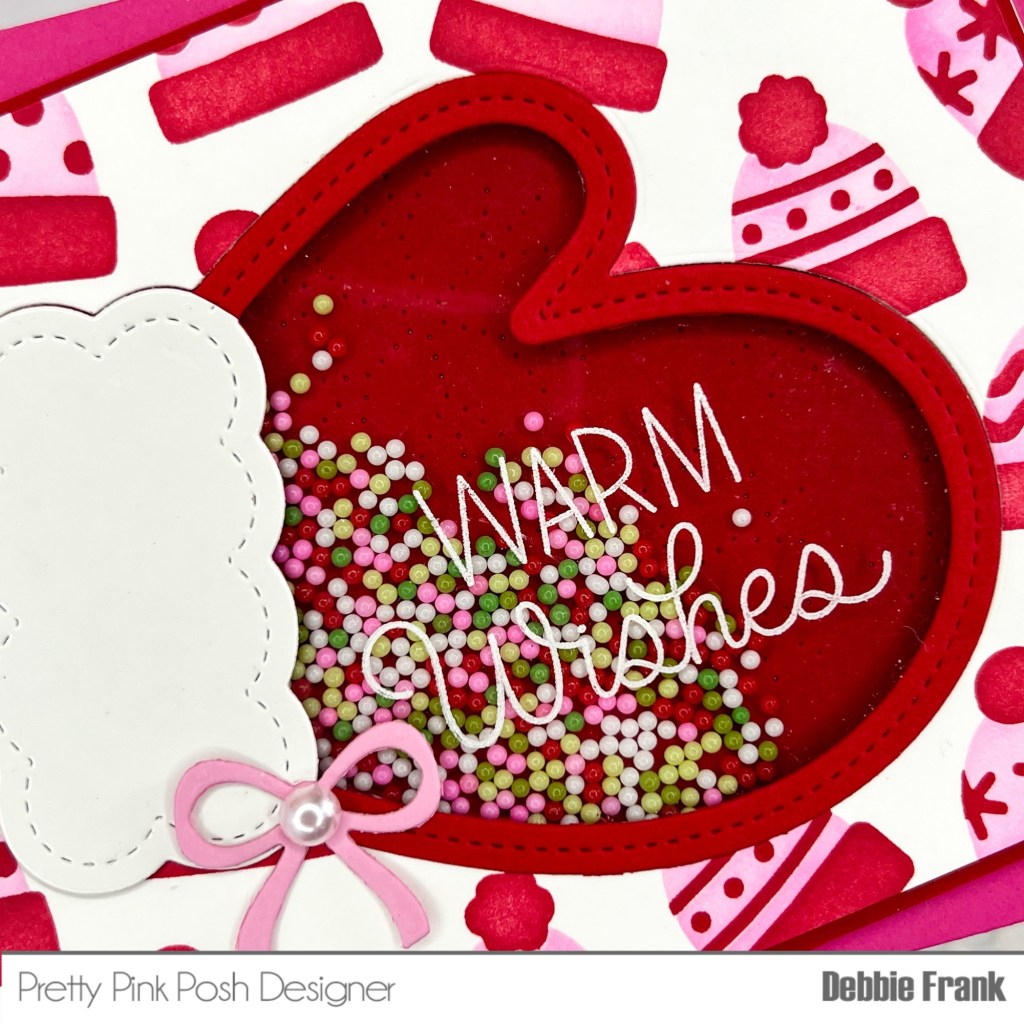
In the middle of the panel die cut out the mitten at a slight angle. On the back side of the panel attach clear acetate with double sided adhesive.
Then with the panel and the acetate already attached place into the Misti. With Stazon White ink stamp out the sentiment. I chose the Let in Snow from the Winter Greetings Stamp Set.
Die cut out the mitten from the same red you will use for the mat. Then I did cut again from a glossy white cardstock from SSS. Cutting off the frame of the mitten. I just wanted the base around the wrist. Attach on the red frame with liquid glue. Then adhere on the acetate.
On the back of the panel, add enough foam tape to make a well for the Christmas Cookies Shaker Beads
Adhere the red Pierced Snowflakes panel over the well with the beads.
Final touch was the pink bow from the Beautiful Bows Dies and in the center is Marshmallow Pearl.
Thanks for stopping by and stayed crafty my friends!


Leave a comment