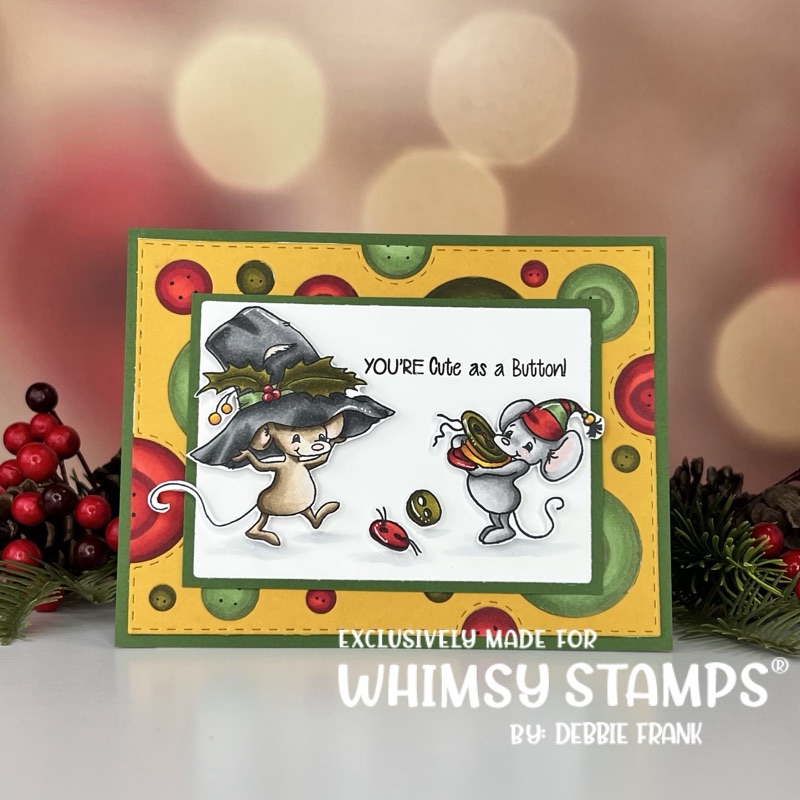
How cute is this?! I absolutely love how it turned out and not that hard to do! For this I used the Swiss Dots A2 Cover Plate along with Very Mice Stamp Set from Whimsy Stamps.
To start off I die cut out the Swiss Dots A2 Cover Plate from Lawn Fawn Number 2 Pencil card stock. Then placed it over a Neenah #80 Classic Crest. And in each of the circles I penciled them in, with the large dots I added in one of the smaller dots to give it more of a button look. Removed the Swiss Dots and copic colored in the circles.
Since I had my Copics ready I stamped out the images from the set to color as well.
COPIC Coloring Guide:
R24, R27, R29, R39
G21, G24, G94
YG95, YG97, YG99
Y18, YR24, YR27
Mouse: N0, N1, N2, N3, N4, R11
E42, E43
Hat:N1, N3, N4, N5, N6, N8
Mouse: E44, E43, E42, E41, R11
After the coloring the buttons, I added in black dots to make the holes of the buttons. Then, I fussy cut out the images and popped them up with foam squares. I attach the Swiss Dots panel along with the colored button panel. I did, trimming off the white edges that hung over.
Then with the Mix & Match Scalloped Die I die cut out a white panel and stamped in the sentiment. The “Cute as a Button” was from the set. But, I need the “You’re” which I found in the Simple Sentiment set, by masking off part of another sentiment. I then mat it with a green card stock and attached to the Swiss Dots A2 panel. The Swiss Dots panel was matted as well with the same green card stock.
Before I added the images I grounded them, by placing them close to where I wanted them. I took a C2 and C0 and blended on some color under their feet and the buttons.
Attaching it to a standard A2 card base.
Affiliate links are attached with no extra costs to you.
Thanks for stopping by and stay crafty my friends!


Leave a comment