Hi Crafty Friends, this is my first time making a three way interactive card! I had the idea just before going to bed the other night, and hoping I remembered all the different ways I wanted it to go with it.
I started off by grabbing a 5X7 panel of lavender card stock and ink blended on with Distress Oxides-Milled Lavender, Villainous Potion, and Black Soot. Next with it on a grip mat, I placed the Spooky Sky stencil part A first. I didn’t use the stencil with the bats, so just the two from the three stencils that comes with it. With a Pouncer I pounced on at first white pigment ink, and then went to the Milled Lavender. Then with the stars I used the Fossilized Amber, I started with Squeezed Lemonade but I didn’t care for it. But of course it needs some splatter since it’s a Halloween card. With it in my splat box, I used Raven Splatter Effects by Spellbinders and Liquid Cinderella’s Shoes by Picket Fence I went to town! Set it to the side to dry.
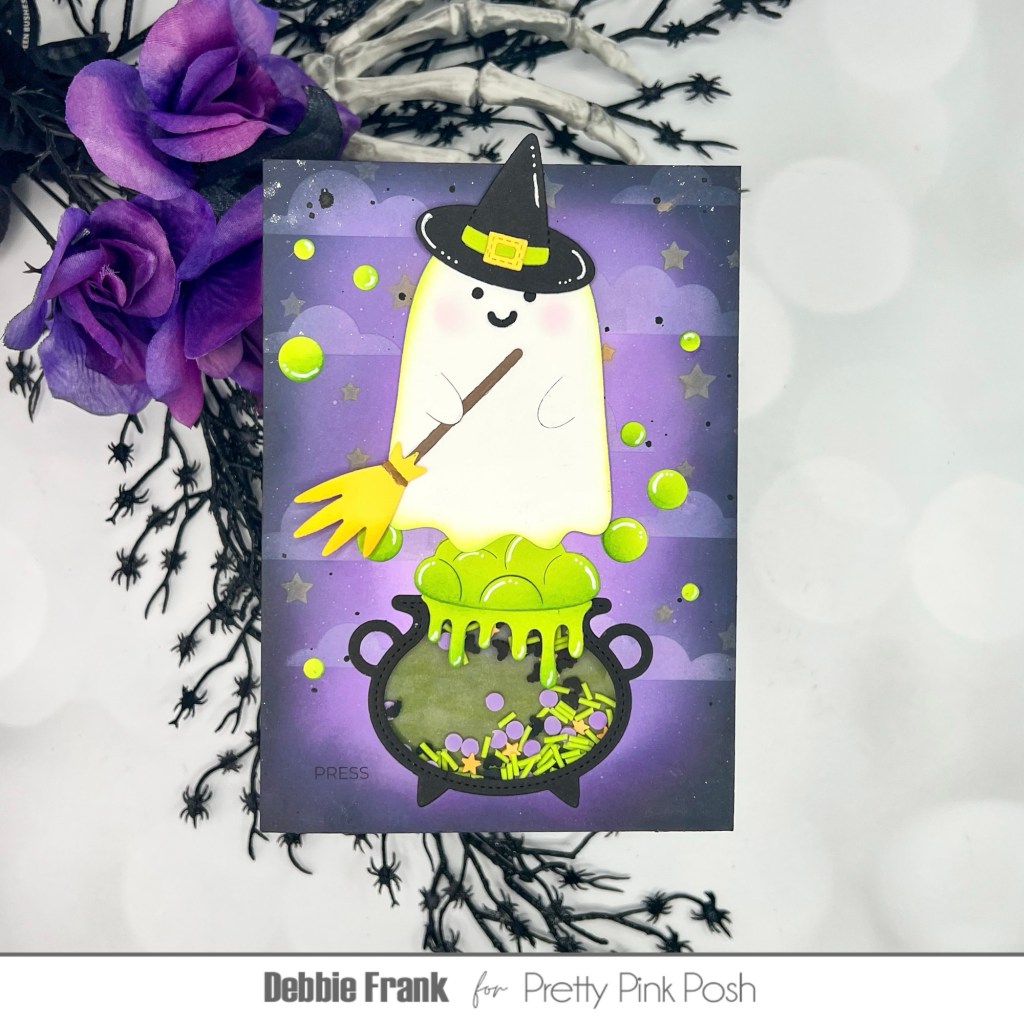
Next I die cut out the Cauldron Shaker Die from black card stock with the inside piece also for the shaker. Then from the Halloween Mug Add-on Die set, I grabbed the bubbly potion die and cut it from a lime card stock. I did it a couple of times for extra bubbles! When I use the die to die cut out from the panel, I save the two pieces in the handles to in lay once I start assembling the card. You’ll need a piece of acetate big enough to cover the cauldron opening.
Now I die cut out the Ghost Holder die, he’ll be attached to the pendulum. I did do a little ink blending on the edge of the ghost for a glow. He is so cute by I thought he needed a broom to stir the pot! And a witches hat, so from the Halloween Holder Die Set there is a broom and Hat. But I wanted the hat from the Halloween Mug Add-on die set. Only because it has a band and buckle to put on the witches hat.
For my light I used the Halo light from Pear Blossom Press. This is the first time using it, it is easy to use. But my problem the cauldron isn’t the round shape that the lights are.

Okay here we go, I don’t have photos to show so I hope I explain it clearly.
- Die cut out the Cauldron from the panel, make sure it’s low enough for the ghost to swing about.
- Stamp out your sentiment where the ghost will be, a little above center. I used Ghost Friends Stamp set, for the “Spooky Wishes” and if you know where you’ll put the push button for the halo light you can stamp in the “press” I have the stamp from Pear Blossom Press. Mine is in the bottom left side of the panel.
- Next place a panel of black card stock over the opening on the front side. It doesn’t need to be the full size, it will hinder the pendulum. It is easier if it’s the same width as the panel. Next, flip both panels over and pencil in the opening of the cauldron. The lights will be on the back side, so you’ll need to know where to place it and make openings for the lights in the solid black panel.
- I taped the halo down and with a pencil marked about where the lights are and used a hole punch for the openings. Don’t forget you have already stamped in your press, so make sure the halo lights are in the correct direction.
- Place the Ghost in place and with a pencil mark the center area of the where the head will be. Using a hole punch about a 1/4 inch punch in a hole for the round foam. You will have to stack two of them to have enough clearance to swing.
- You can check your work to see if the lights are close to the opening and your stamp for press is correct.
- Before I started to assemble my card I took a piece of vellum and with Copic YG03 colored on the vellum. Then glued it on the front of the black card stock to cover the holes.
- Attach the acetate to the back of the panel with double sided adhesive. Then add double thick foam strips, Pear Blossom Press is literally the best! Keeping in mind the pendulum, so only on the sides and top. And around where the halo light will be, you can temporarily place it in and use the foam to butt up against the push button.
- Next, place it in your Misti with the panel down, add your shaker bits. I used the Spooky Night Clay Confetti. Remove the release backing and attach the vellum-black card stock over the opening. I kept the area where the push button goes open from the card stock. Now you can double check to see if every thing is lining up right.
- Now we will attach the Ghost, so with a strip of sturdy card stock about 2 inches and a penny. I used a sentiment die that has rounded corners, I used double sided adhesive tape and taped the penny on one side. Flip it over and placed two round foam to the other side opposite end and flip side of the penny. Place the foam though the hole on top and stick your ghost on.
- Next it the Halo light add double sided adhesive tape to the back of the halo lights and place it in the spot needed for the light and the push. You can lift it over your head to check.
- This is where I found that the pendulum didn’t swing as well as I wanted and added another layer of foam stripes. This is definitely I hand delivered card!
- With it in the Misti and with a 5X7 card base, I placed it over the top. If it doesn’t line up correctly, you can peel it back off and try again. The Best Foam tape by Pear Blossom Press, gives you 30 minutes to adjust before it is set.

So, now that that is done we can finish it by adhering the face, black cauldron frame, witches hat, and broom with liquid glue. For the bubble portion on the cauldron. There a slit that the die makes, I popped it up so the light can come through. I ended up adding just a sliver of foam underneath the one bubble. I attached bubbles going up both sides of the ghost.
I know it’s a lot and it took me a good part of the day, but it’s so fun!
Let me know in the comments if you’ll give it a try. You can always do just two interactive!
Affiliate links are attached with no extra cost to you.
Thanks for stopping by and have a crafty day!


Leave a comment