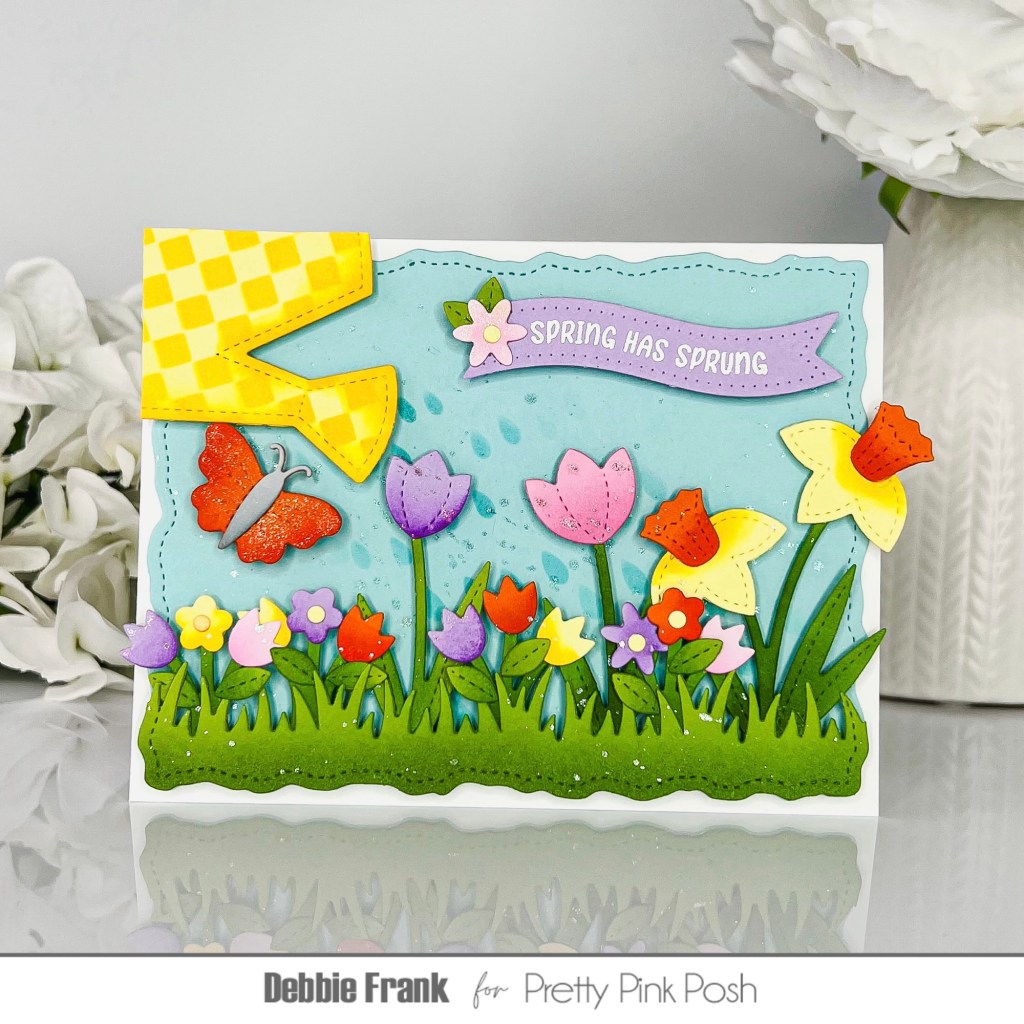
Hi crafty friends! I had this idea for some time once the Watering Can Shaker Die came out from Pretty Pink Posh. I’m not sure that I pulled it off well enough for you to tell that it is the watering can over the flowers.
I started off with a light blue card stock on the grip mat and adding the Waterdrops stencil over the card stock, carefully adding the blue water drops coming out of the can. I placed the die down about where I wanted it and then did some masking with low tack tape having it at angles. So that it looked like a piece of pie. I did add some diluted down blue ink and splattered but it didn’t show up as well as I hoped, so I’ll come back to this on how I fixed it. After the panel was dry, I die-cut it out using the Stitched Torn Rectangle die.
Next, for the watering can I started off with a panel of white card stock and yellow ink blending on the Mini Checker Stencil. Then I die-cut it out with the Watering Can Die, and went back with the yellow ink and added more on the edges and lightly over the whole die cut.
Then with the Stitched Spring Flower Dies, I die-cut them out of a light lavender, pink and orange card stock and a lime green for the foliage. Adding some shading on the edges for dimension. Using the Grassy Border die, I die cut out the grass and went back with the Stitched Torn Rectangle dies to cut it out to match the panel.
I popped the flowers and grass on the panel then with a shimmer I splattered it on to make it look like water droplets. After it dried I finished attaching on the rest of the flowers, butterfly and the sentiment.
From the Springtime Holder Addition Dies there is the perfect sized Butterfly die. I needed more flowers that were higher to fill my sky. So with the spring Florals Dies set I die cut out the smaller Daffodils to bring the Yellow to the other side of the card.
For the sentiment I stamped, and white heat embossed the “Spring has Sprung” from the Easter Banner Greetings Stamp set. Afterwards die cutting it out with the Banner Greetings 3 die set.
I started to assemble my card by first attaching the panel to the card base. Then with foam on the back of the Grassy Border die cut I adhered the flowers to the foam. This way I could flip I over on the panel but not attach it yet. I need to make sure I had room for the watering can but not over the flowers. Once I was happy with the flowers on the border, I placed the can on the panel where the water was pouring out and trimmed off the extra of the can.
The final touch was adding a shimmer pen to the flowers and adding one more small flower up by the sentiment.


Leave a comment